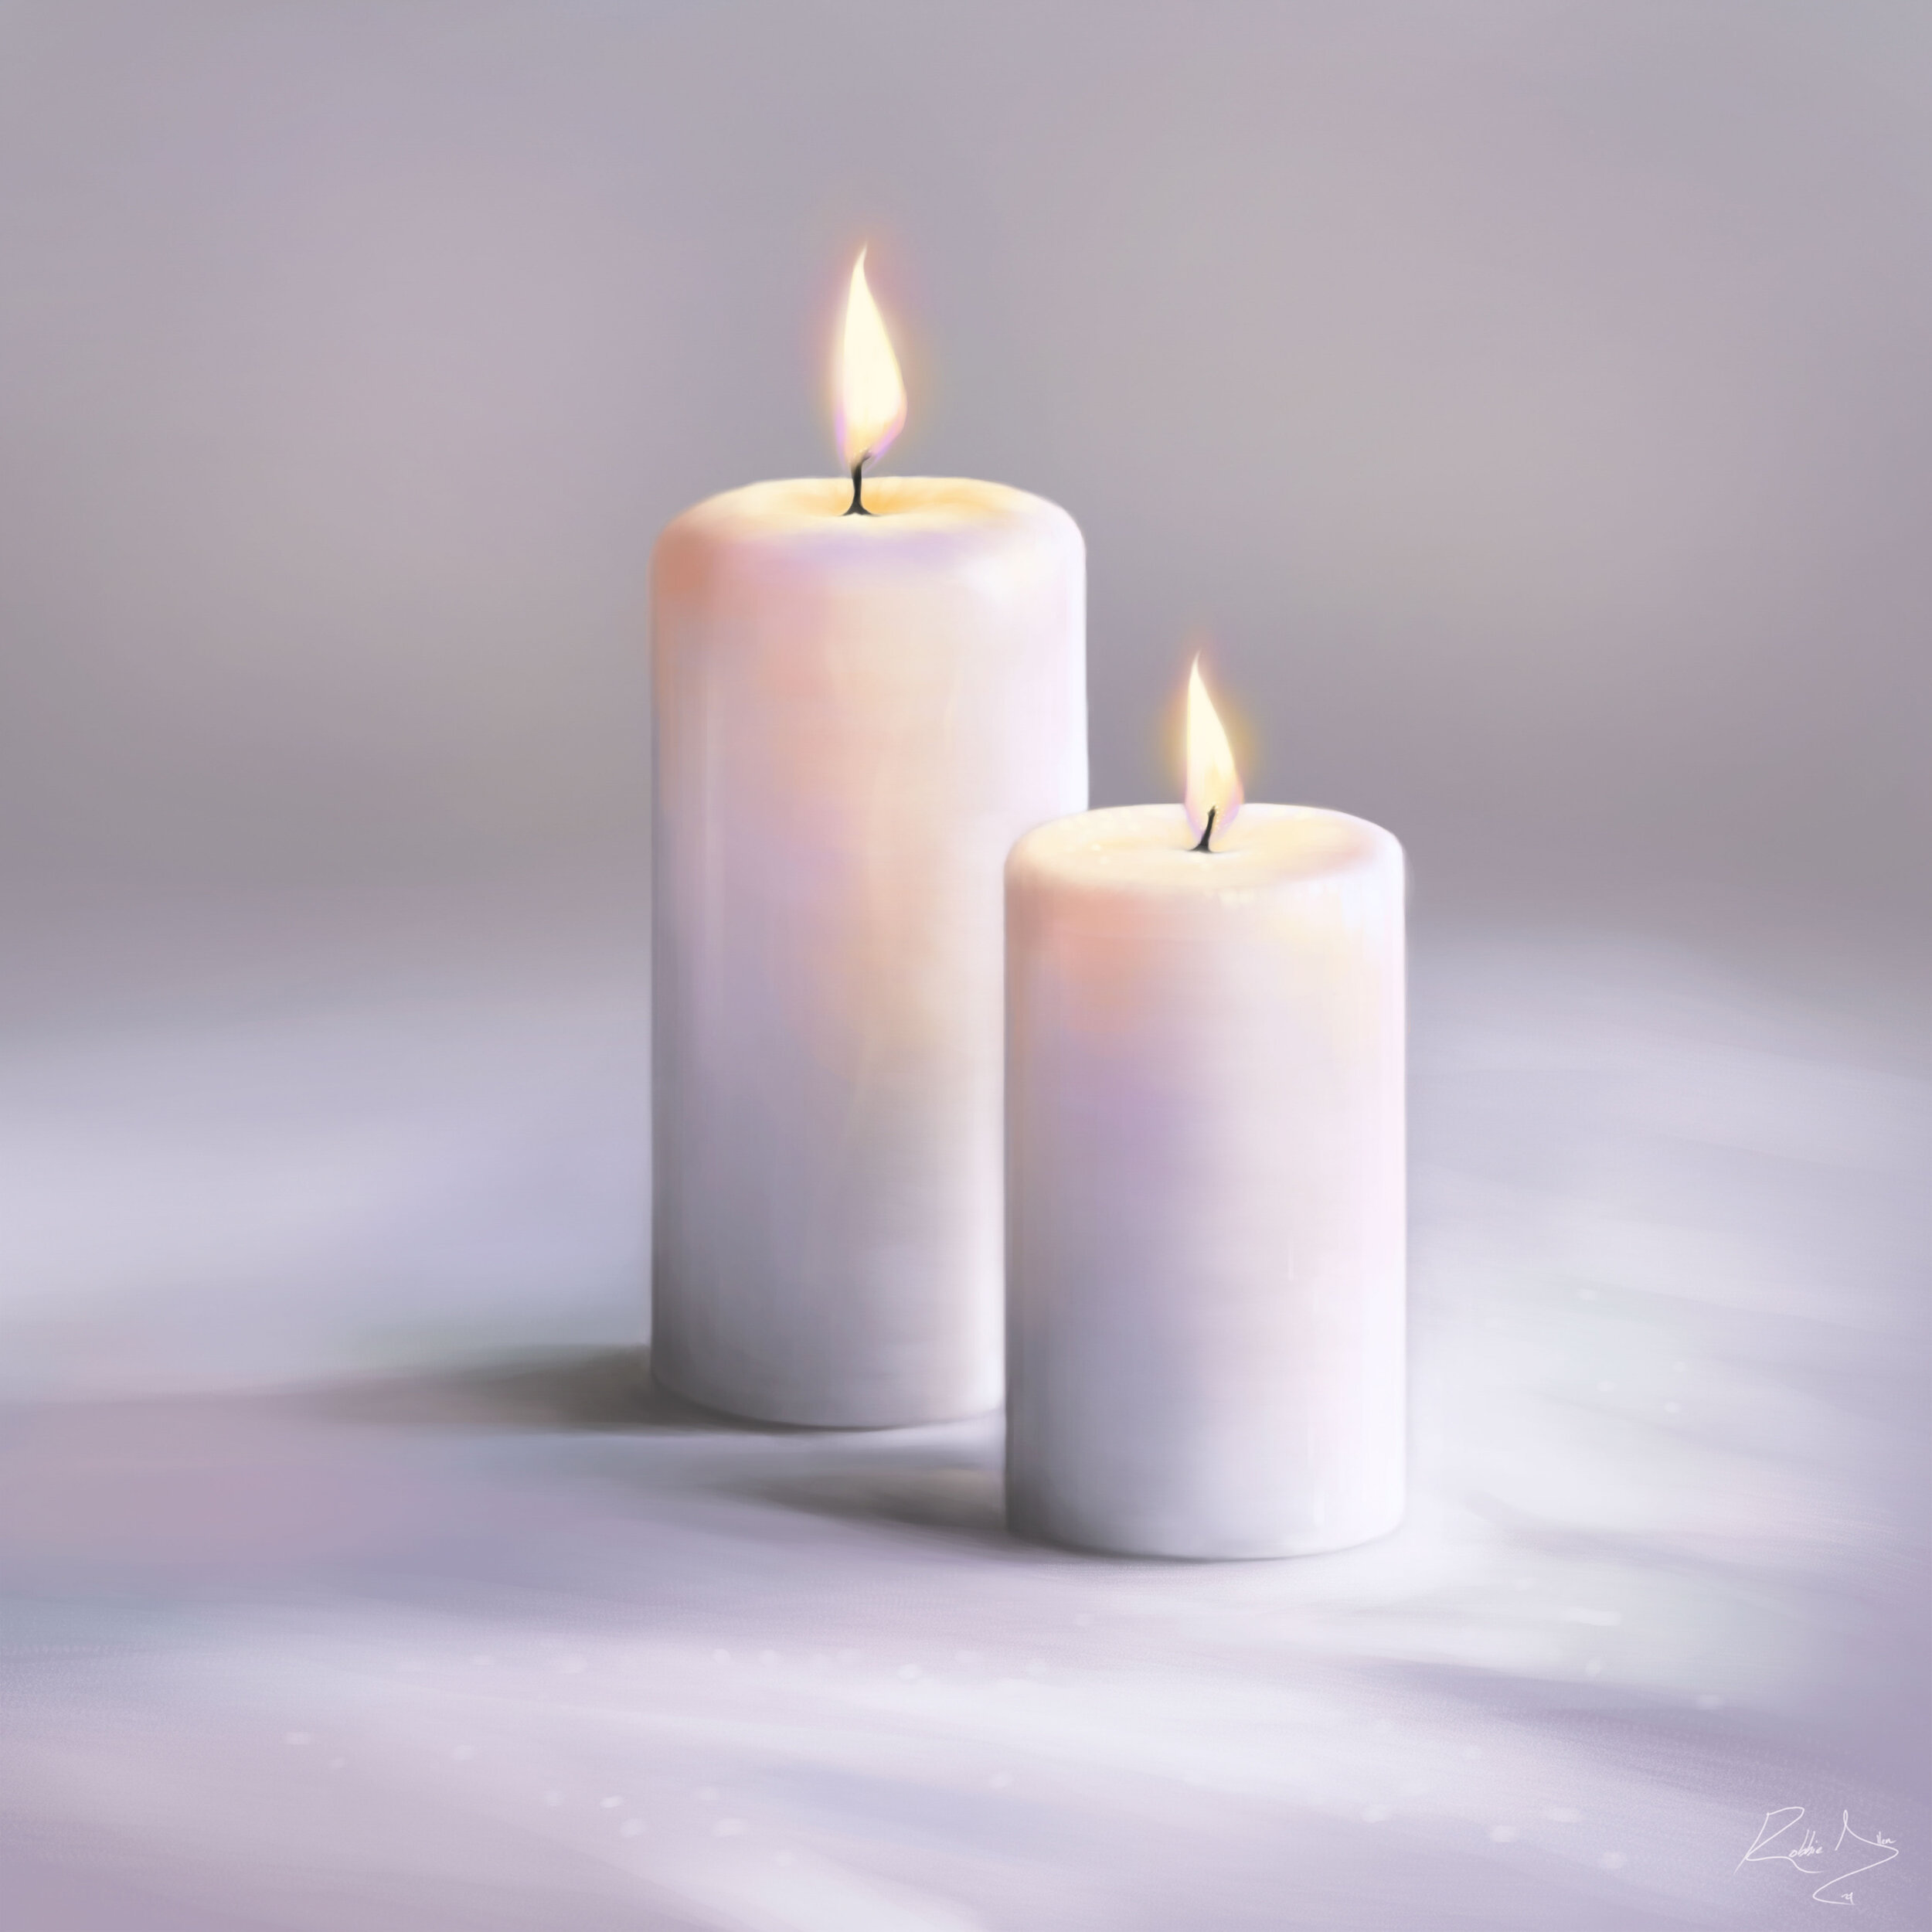
There’s something quite magical about learning how to paint certain textures and elements, especially fire or the glow of a naked flame on a candle, and how it interacts with surrounding objects.
In this tutorial I break down in a few simple steps, how to paint candles in natural lighting digitally using Photoshop or Procreate.
Step 1. Paint The Background
I find it to be enjoyable and satisfying to first paint in some of the background, even if loosely. This gives you something to work with quickly and removes the blank canvas. This will also help your wrist and hand-to-eye coordination warm up for the task ahead.
Step 2. Sketch The Candles.
Sketching the main objects in the scene first allows us to get our composition and correct proportions down early, and helps to save time later on from making unnecessary corrections.
Step 3. Local Colour
Identify what the local colours for each of the objects are early on and paint them as solid shapes. This will enable us to make a more accurate representation of what we see in reality, and help us to choose the correct local values and colour hues/saturation.
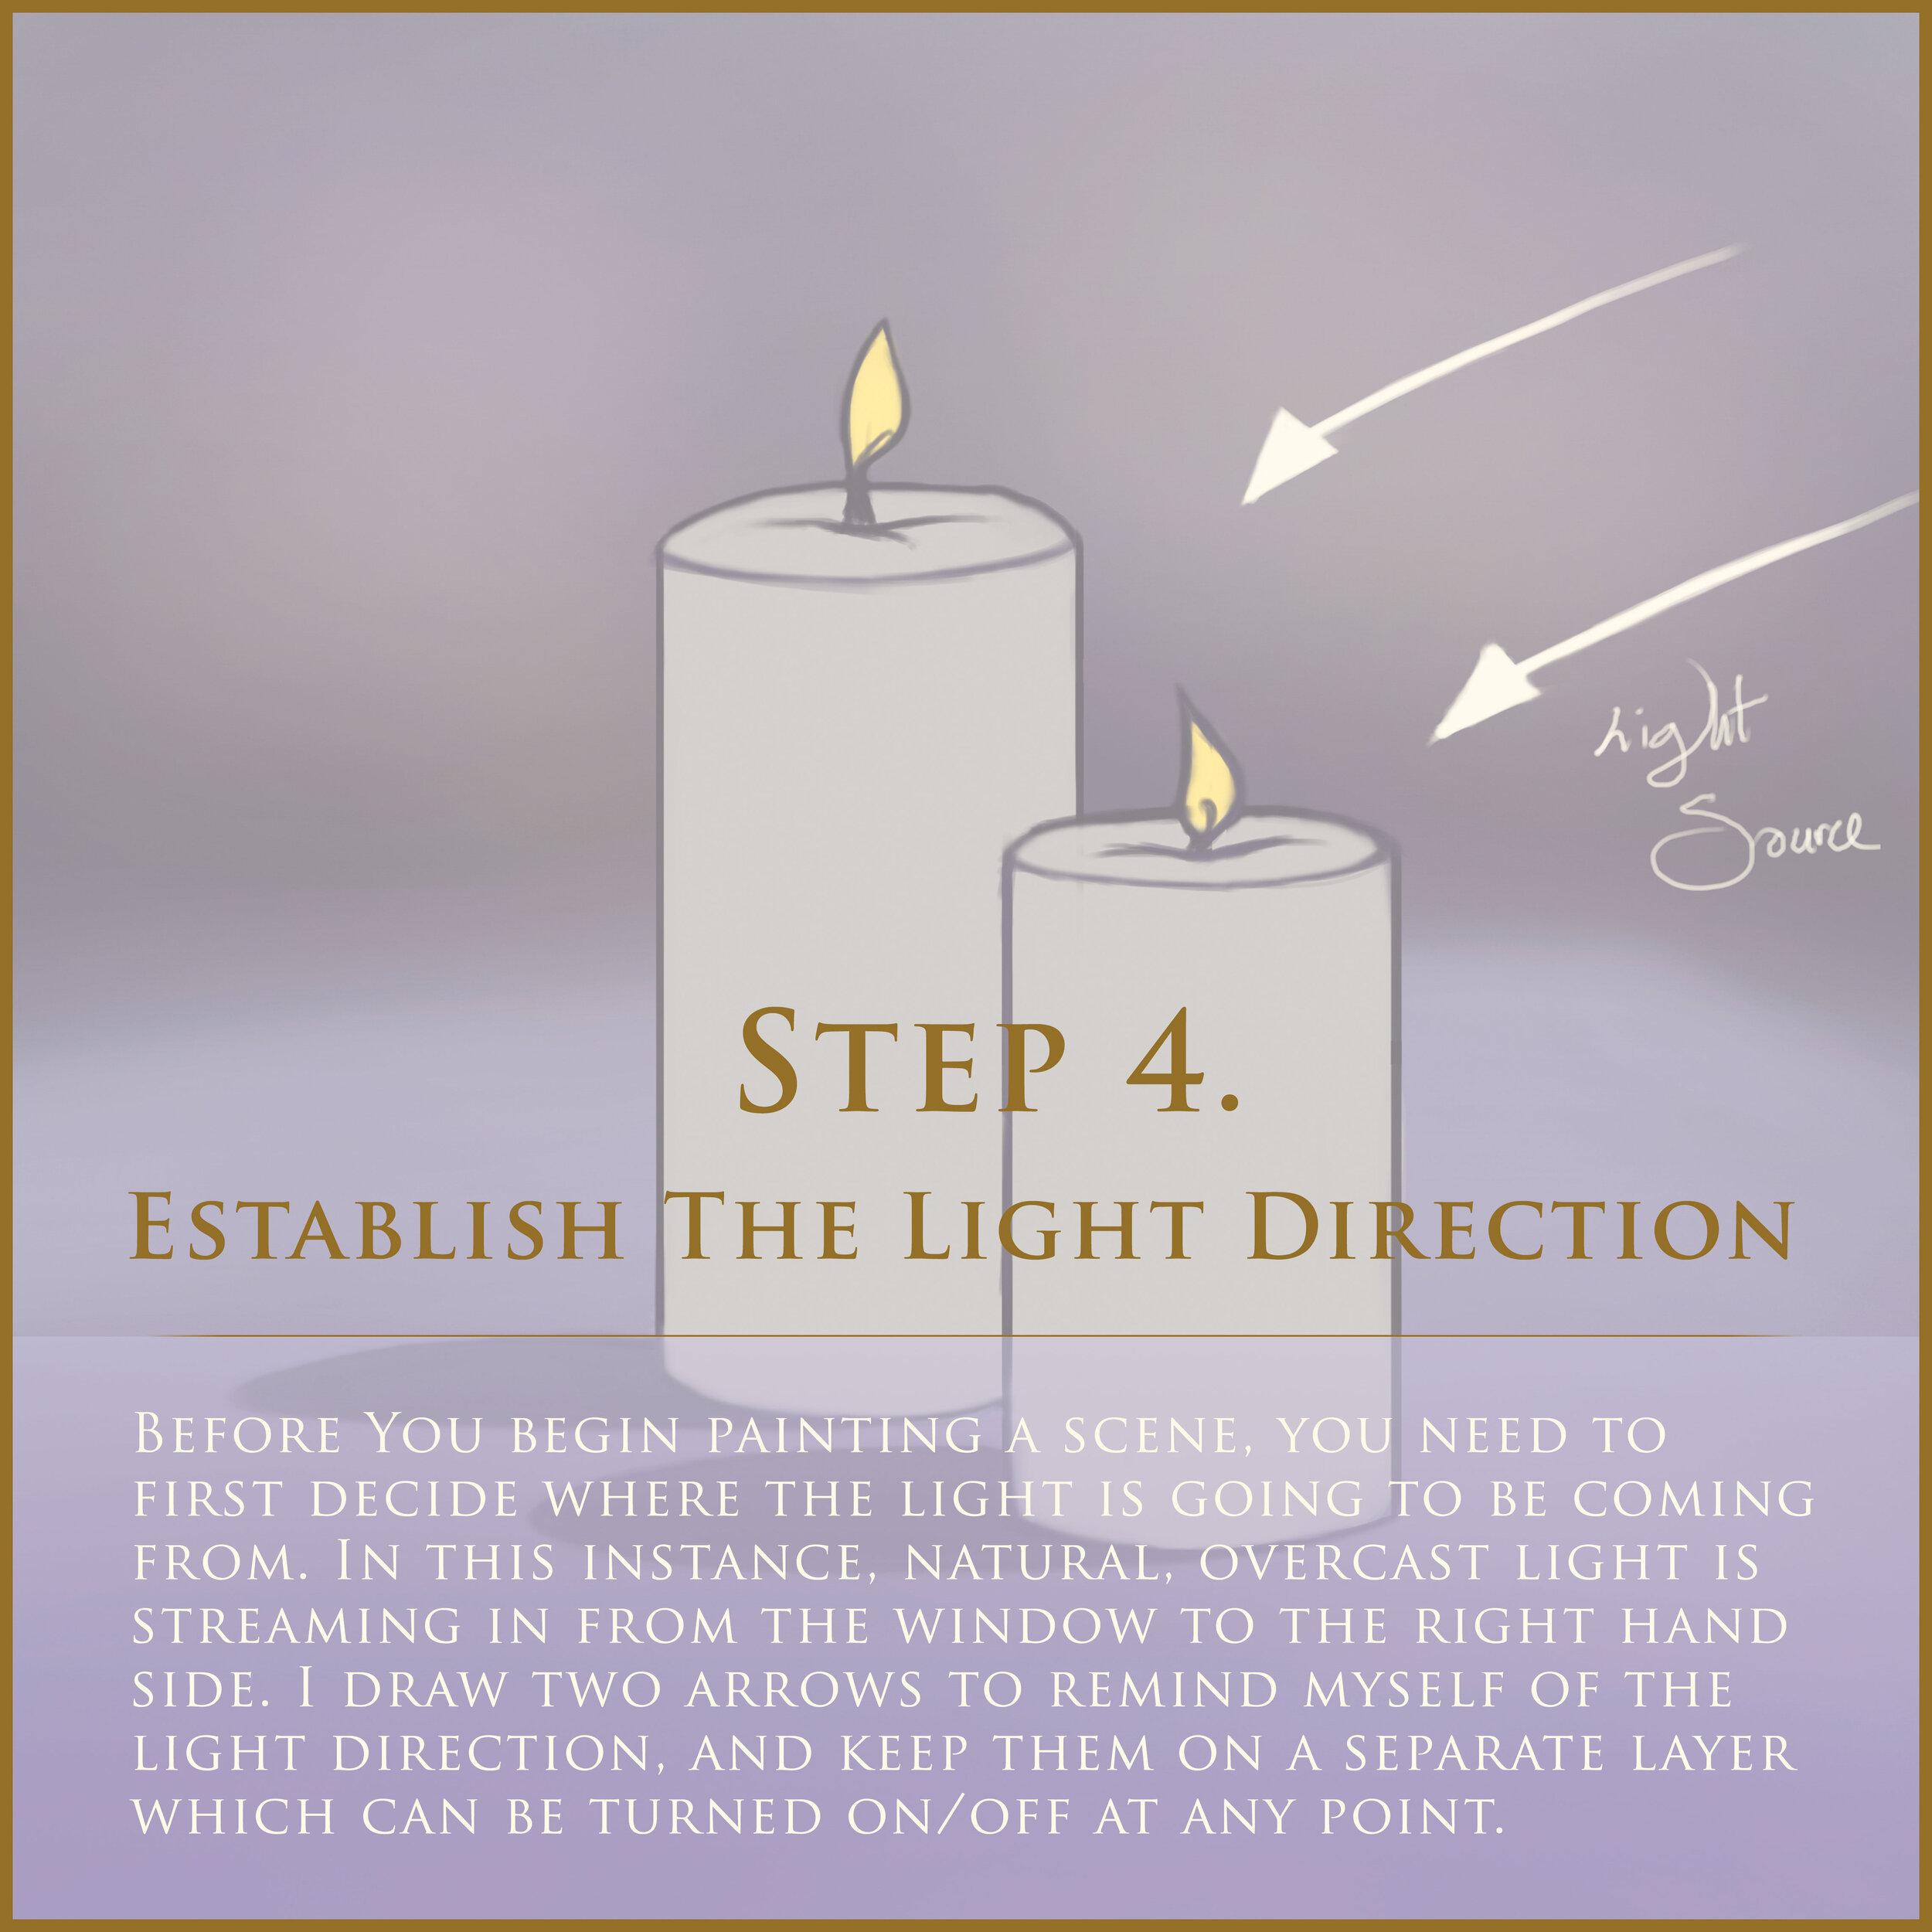
Step 4. Establish The Light Direction
Making a mental note of where the light source is, is enough. But with the digital medium you have the liberty of being able to create multiple layers, so why not create one to remind you of the light source direction to refer back to at any time?
Step 5. Apply A Gradient
I don’t usually use gradients, but it’s fun to try different techniques that can speed up the process a little. You can also paint this colours in as you would using a traditional medium. Experiment and practice the techniques that you enjoy the most and that work for you.
Step 6. Begin Painting
Now you can really get in the zone of the painting process! Obviously it helps to turn off all distractions for a period of time, to allow for uninterrupted, deep work.
Notice the colours on the candle that are influenced by the light source, and light bouncing off near by objects. In this particular set up I was able to see varying shades of yellows, oranges, blues and violets on the white candles.
The surface of the candle can be quite reflective and translucent. Warm and cool colours enter the surface and scatter around, and can give the appearance of a soft glow in different areas of the candle. When you really look, you will be surprised at how many varying shades of colour you can detect.
Step 7. Pay Attention To Texture
Textures can seem daunting at first, but don’t be put off! Carefully analyse the object, focus and ask yourself questions, paint what you see slowly, and before you know it, you would have painted a new texture! Start off with the big shapes, and gradually build up with smaller brush strokes. Textures are often most visible at the point where there is a plane change, or change of light, or colour.
As mentioned in the previous step, pay attention to how the light and colour is interacting with the texture of the candle. Subsurface scattering occurs on objects that have a translucent quality or transparency to them, the textures of the candles surface should be painted on top of such glowing effects.
Step 8. The Glow of The Flame
Adding lighting/glowing effects and details is great fun, and really brings your painting study to life! Again, carefully look at what you see in reality, notice subtle hue (colour) shifts, and paint them in.
Step 9. Adding The Final Details
And finally for the most relaxing and enjoyable part, painting in the details! Don’t be in a hurry at this stage even though you sense you are close to the finish line. Enjoy the moment that you have reached in the painting, choose carefully what areas to detail, and what to leave out, take a break, come back and have another look, before you finally call it finished.
The level of detail you apply is up to you, it’s your creative choice as an artist, and you might want to paint in more or less detail depending on the situation.
Step 10. The Finished Painting
Now that your painting study is complete, you can appreciate the work you have done. Well done! Take a break and reward yourself, then think about what to paint next.
If you liked this digital painting tutorial, please feel free to like, comment and share it. I’m open to feedback and suggestions, so go ahead!
Thank you and see you in the next post,


