
Painting a portrait of one of my favourite animals, the wolf! In this tutorial I will show you the step-by-step process and my thought process of how to paint a realistic digital portrait of a wolf using Adobe Photoshop.
This isn't the first time I've painted a wolf, I have felt on a number of occasions in the past that I either wanted to draw or paint one, and then went on to do so.
Over the weekend I painted this study of a wolf. This one is a painting study from a photo, with a few added bits to the background for practice.
I painted this using Adobe Photoshop, but you should be able to paint a study just like this one in software such as Procreate for the Ipad Pro.
I don't know the original source of the photo that I painted from, but I believe it was saved from Pinterest.

Above image: Step1. The early stages of the panting.
I laid down a warm grey background and focused on the shadow areas first, leaving the highlight areas until the very end. This isn't how I always work, but for this painting, and with the lighting conditions on the wolf, it seemed like the best option.

Above image: Step 2. Painting development.
At this stage I realise that I got the tilt of the head slightly wrong, but I decide to stick with it because I prefer it to the original. I also paint with one ragged, round brush in Photoshop, and lightly erase with the same brush, and sometimes a soft brush on outer layers of fur.

Above image: Step 3. I then paint my strokes in the direction the individual clumps of fur are flowing in. This adds to the realism of the fur, and makes the painting more believable and lifelike.
I continue to paint with a hard round brush set to pen pressure, and erase lightly with a soft brush set to opacity/pen pressure.

Above image: Step 4. The next step is to begin painting the lightest light areas of the fur.
I continue to paint with a hard, round brush set to opacity/pen pressure.
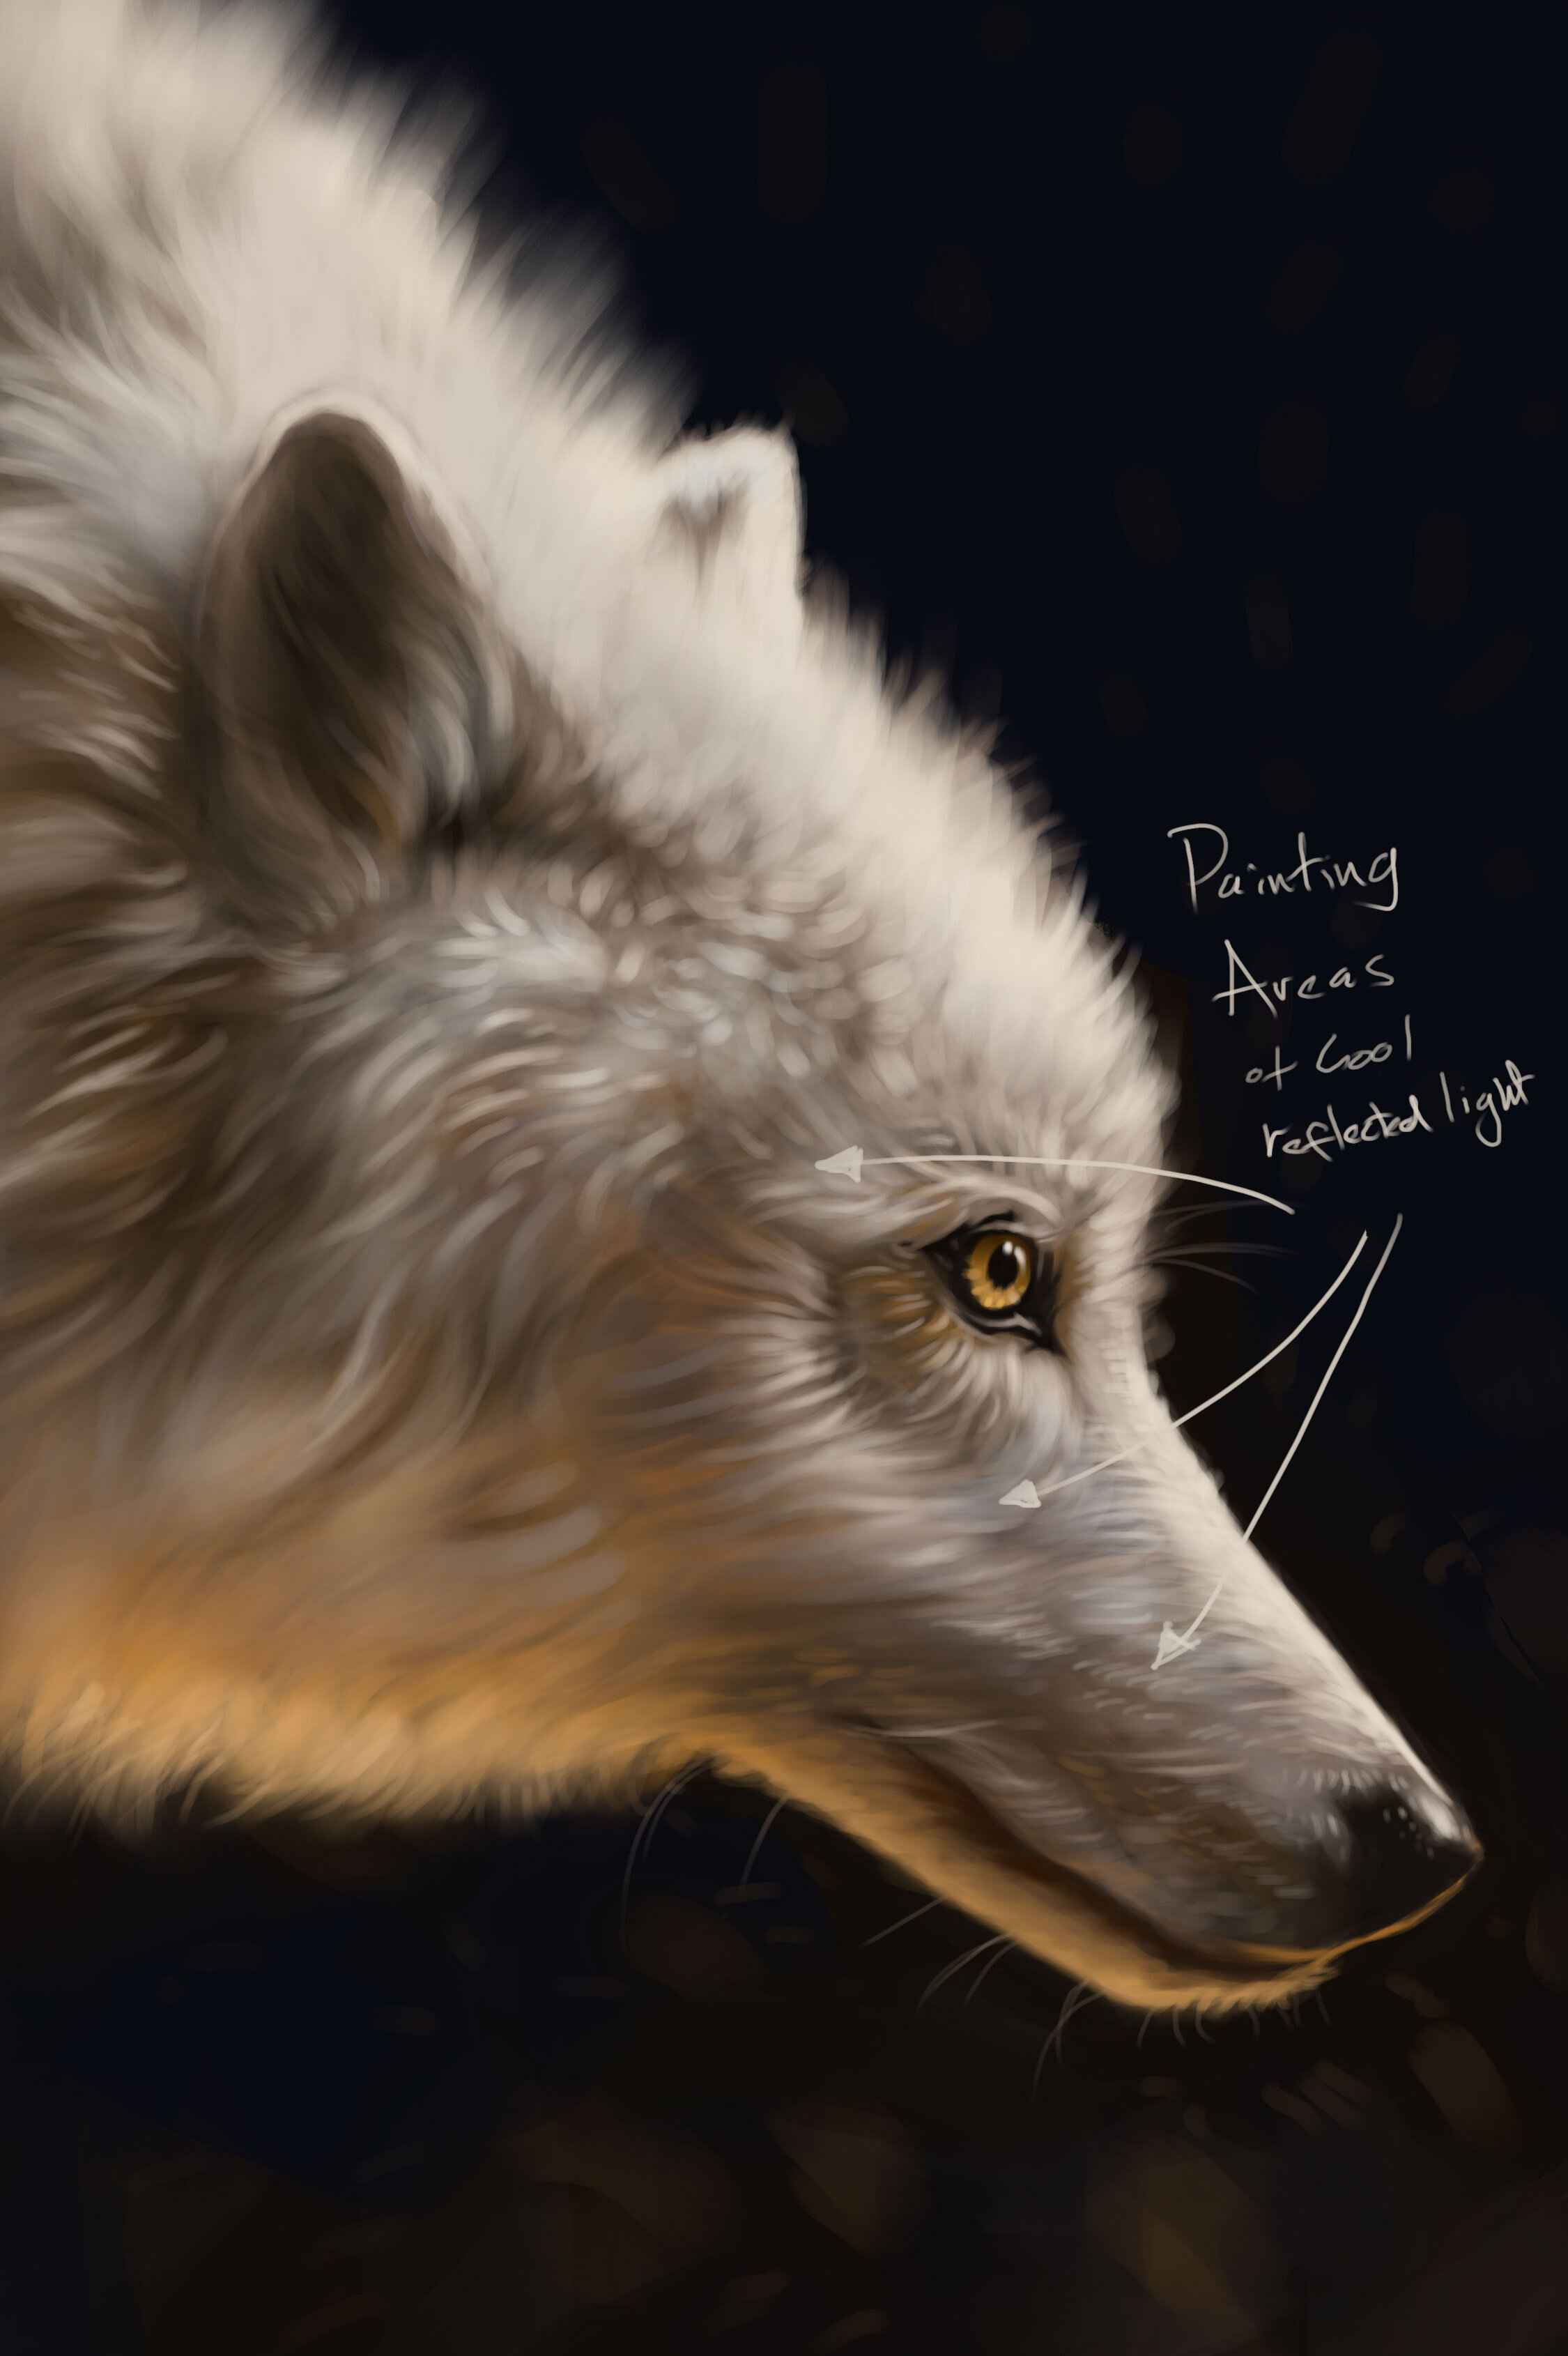
Above image: Step 5. Painting more lightest areas of fur, and cool, reflected light.
Be aware of any bounce light or reflected light from objects in the scene, which brings some of the colour being reflected onto the closest areas of the subject matter. In this case, there is some cool, bounce light coming to the right and above the face of the wolf.
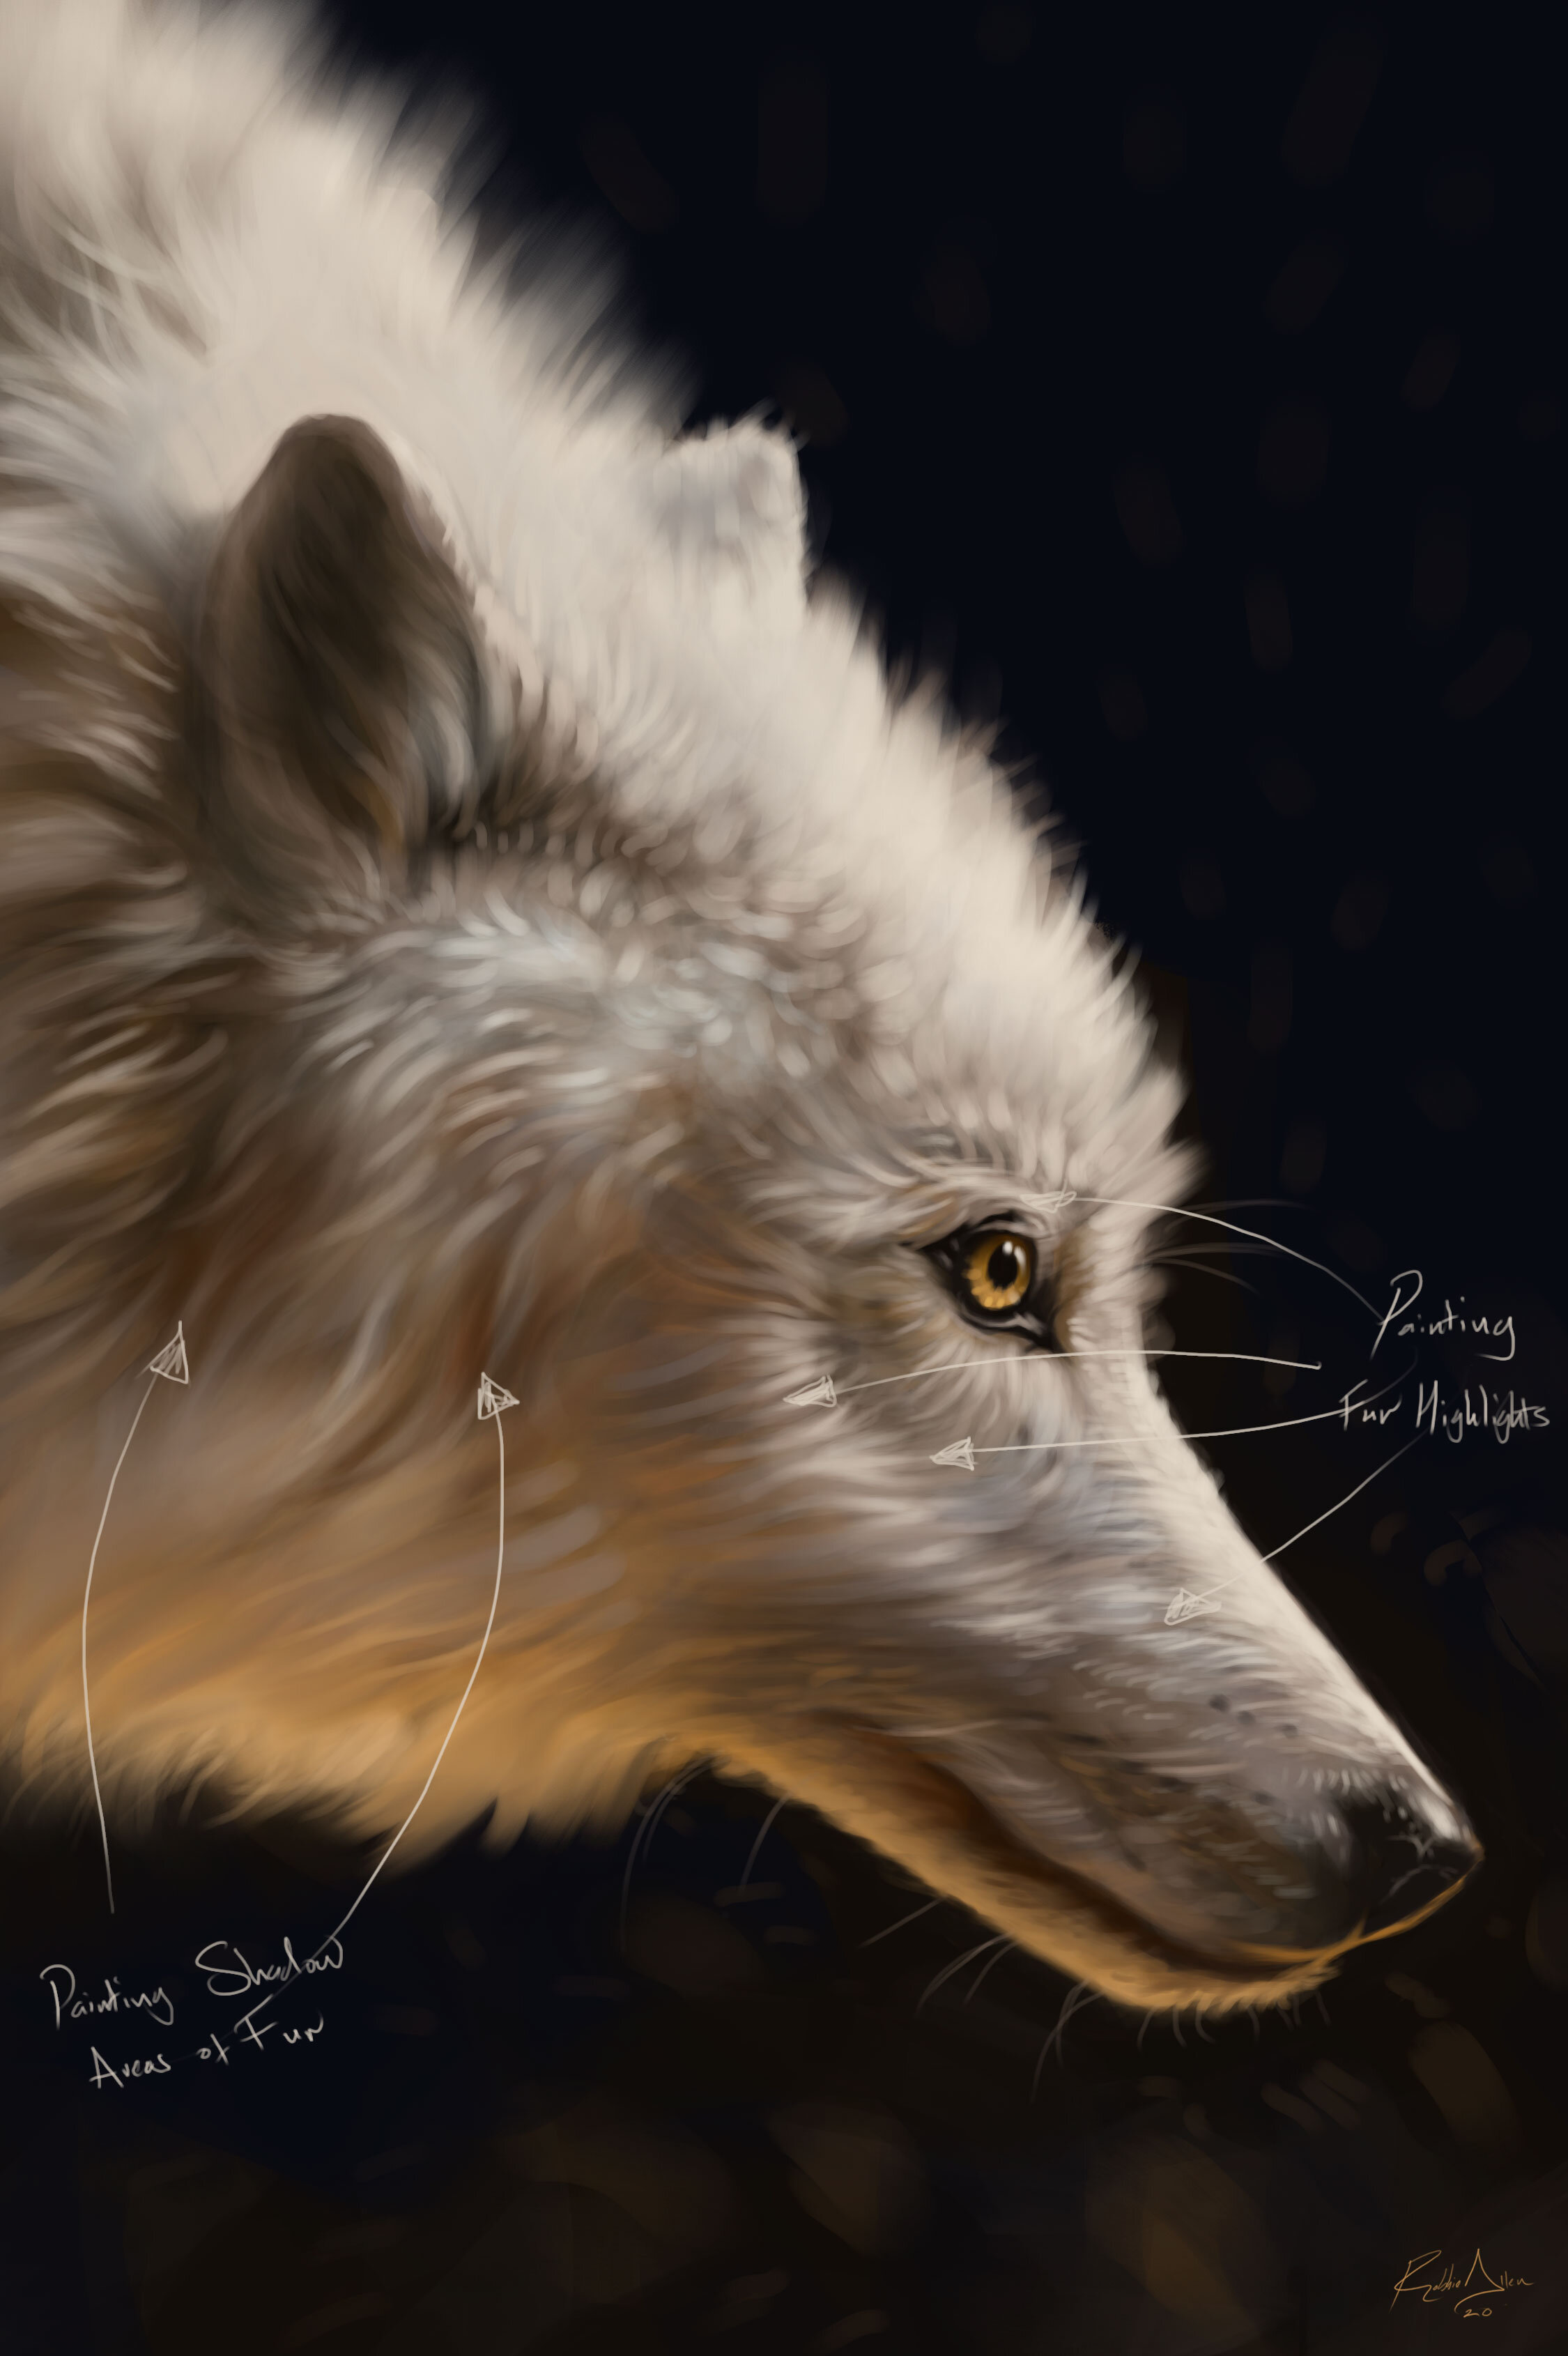
Above image: Step 6. I continue to paint details of the highlights in the fur, and warm shadow areas.

Above image: Step 7. I add details to the eye, the highlight of the warm light source coming from below the wolf, and I paint the wolfs whiskers in one thin stroke each.

Above image: Step 8. I add some additional background elements, such as bits of burning embers that I imagine to be coming up off a fire.

Above image: Step 9. Levels adjustment.
Finally create a new Levels adjustment layer, and slightly increase the intensity of the lights by sliding the highlight bar. This gives the painting a bit more punch and contrast.
And then I'm ready to call it finished!

Above image: The finished painting.
Thank you very much for reading and appreciating my blog post tutorial. If you would like to see more of these in the future, please let me know in the comments section below!
Robbie